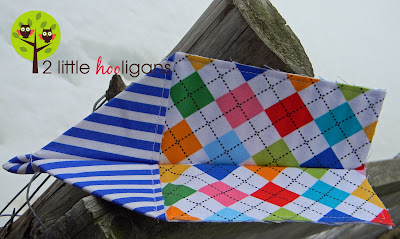
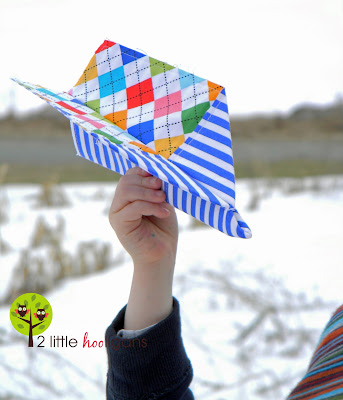
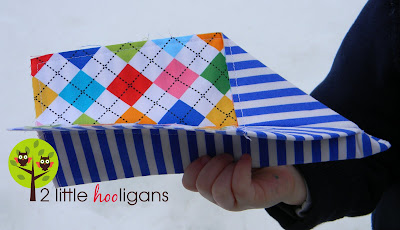
 This just may be the easiest and funnest project I have done for my kiddo’s. We are obsessed with paper airplanes right now and while they are fun to make, they just don’t last long, especially once the girls get their hands on them. So I got to thinking…why not make a fabric airplane?! And there is what, a super quick, easy and fun project for everyone to enjoy. These are very similar to making a paper airplane as you need to make sure all the sides are even and ironed well on the creases. I have only made this one design so far because, well, it works great and just didn’t feel like making another design. When you’ve got a good thing why change it right? And just in case you were wondering these little fabric planes can fly. They are way better you average paper airplane, at least the ones we were make in this house. Here is where I got the design for the airplane I used in this tutorial, of course he made his out of paper. There are a lot of other designs there as well, so give it a shot and try something new, just let me know how it works. So lets get started!
 Fabric Airplane Tutorial
(10 minutes per plane)
Materials Needed:
*fat quarters or large scraps
*iron on stabilizer or backing (I used pellon 809 Decor Bond from JoAnn’s)
 Iron the stabilizer onto the wrong side of fabric. Use your piece of paper as a template and cut the fabric to the same size as the piece of paper.
 Iron front and back of pieces again to make sure the stabilizer is fully adhered. Using a 1/4″ sew seam, sew around the sides and bottom of the fabric. Make sure not to sew along the top. This will make sure that the fabric and stabilizer stay together better. And hopefully make your airplane last longer.
 Now take the top edge and fold down about 1/2″. Make sure it is very straight and even. Iron in place.
 And fold and iron one more time. You should have folded and ironed 3 times. Flip fabric over and iron the backside as well.
  Now fold sides together and iron.
 Unfold and take the right top edge and fold down to the crease in the middle, making a triangle shape.
 Iron the triangle shape flat. Pin in place and stitch a straight line across the bottom of the triangles to secure them in shape. Make sure you leave a teeny tiny space in between the triangles like I did above. It will make folding the plane together easier.
 You are now going to make the wings by folding them down. I like to fold mine like above. When folding the wings down you will notice the thickness near the tip. I start folding the wing down just a little above that. And I make my wing go up in the back a little bit instead of folding straight down. I think it makes them go faster.
 Now pull both of the wings up. See the crease mark for where you folded your wings down? Use that crease as your guide and stitch right beside the crease. Make sure you back stitch a few times at the beginning and end.
 See where my stitches are? Now unfold and flatten wings up a bit. Iron flat if needed.
 Now if you want to make one with the contrasting fabrics instead (which are way cuter) follow all of the steps above except:
 Fold and follow the same steps like above. And I think we can all agree, they are much cuter with a contrasting fabric!


* 8.5 x 11 piece of card stock or printer paper to use as your template.
Now fold sides together and iron again.
Iron again.
And that’s it, ready for take off!
 Now if you want to make one with the contrasting fabrics instead (which are way cuter) follow all of the steps above except:
Sew two pieces of fabric together, right sides facing out with the stabilizer in the middle. Still sew just around the sides and bottom. Do not sew along the top. This time you are going to fold down two times instead of three. Make sure you still iron and every step and keep everything very straight and even.
Have fun and make up a bunch of them! Now I can’t say for sure how long they will last, we have been playing with ours for about a week now and they are still flying high. If the wings get too bent, just take out your iron and make them straight again.


**Please feel free to use this tutorial for your personal sewing projects. You may link this to your blog and use any photo’s. Please be kind and give credit where credit is due.**
Any questions or comments please do not hesitate to contact me. If you make one using this tutorial, please add it to my flickr group. I would love to see it and you just might see it featured on my blog one day!


oh my – I LOOOOOOOOOOOOOOOOVE this!!!!!! SO awesome!!!
Fabric airplanes? Who woulda thought? 🙂
wouldn't this be cute to make several to decorate a boy's room with by hanging from fishing line from the ceiling??? it's SO hard to find cute ideas to decorate for boys, thank you!!!
I'm going to have to make a couple of these for my nephew's Easter Basket 🙂
That is such a brilliant and cute idea!!
Just a quick note to let you know that a link to this post will be placed on CraftCrave today [02 Apr 01:00am GMT]. Thanks, Maria
These will be great for the boys Easter baskets!!!!!!!!!!!!!!!
We are paper airplane obsessed right now. I'll have to give this a go. I have some fabric stiffener I'll try with it.
Thanks for the great idea!
Those are so fun!!!!! I love them!
Thank you so much for sharing this at last week's For the Kids Friday link party! This week's party is up and running. If you haven't already stopped by, I'd love to have you sharing again this week!
http://sunscholars.blogspot.com/2011/04/for-kids-friday-6.html
:)rachel
Attractive section of content. I just stumbled upon your blog and in accession capital to assert that I get actually enjoyed account your blog posts. Any way I’ll be subscribing to your augment and even I achievement you access consistently quickly.
Merely a smiling visitant here to share the love (:, btw great design and style .
L6e3Xc I am so grateful for your blog.