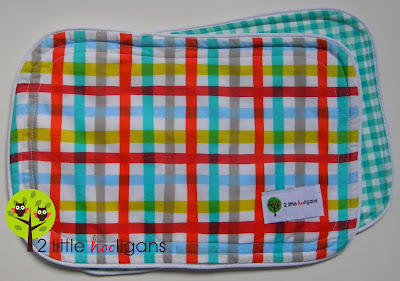
This is a tutorial I first posted over at Nature’s Heirloom as part of her baby series. Now im reposting it here for those of you that missed it the first time. I know there are a ton of tutorials out there for burp cloths, but these are a little different due to the piping around the edges. I love the sweet little rounded edges that the piping gives these burp cloths. Plus I love the size of these burp cloths. Since all three of my kiddo’s were breastfed and hardly spit up, I didn’t need a huge burp cloth. But what I needed was a little cloth to keep on hand for little dribbles or for those nursing accidents. If you prefer a larger cloth, just cut your fabrics out to the desired size and then follow the same directions for sewing the piping on. Just keep in mind that if you are going to make a larger cloth you might need more piping then one package. Now, let’s get started!
 Baby Burp Cloths with Piping Tutorial
 Baby Burp Cloths with Piping Tutorial
(allow 1-2 hours to complete a set)
 Start by making a template by taping two pieces of card stock together. Measure so that the length of the two pieces are 12″ long when taped together. Now round all of the corners.
 Take your piece of cotton fabric and lay it right side up and trace around the template onto the right side of fabric. Add your tag now.
 Open the package of piping and cut the piping in half to give you two pieces of piping. Make you only do this if you are making two burp cloths this size. If you are going to make on larger burp cloth do not cut the piping. Now start pinning the piping in place and make sure you pin a lot! You want the raw edge of the piping to be lined up with the line you just traced with your template. Overlap the piping like shown below when you get to that point. You want to make sure that you do not leave and raw piping edges showing.
 Now gather the minky fabric and flannel. It is time to assemble all three pieces of fabric together. Layer with flannel on the bottom, then minky fabric right side up and then place the cotton fabric on top with right side down. Pin all three pieces in place.
 Here is a closer look of how the fabrics should be lined up.
 Change to a zipper foot and move your needle so that it is even with the edge of your foot and will line up right against the piping. When sewing, make sure that you take your time and sew right against the edge of the piping, just make sure not to sew into the piping. You wont be able to see the piping underneath the top piece of fabric so just take your time here and always make sure the edge of your foot is right against the piping underneath. You will be able to feel where the piping is with your sewing foot. Sew all around the burp cloth, but make sure to leave a 1 1/2″ opening for turning right side out.
 Trim off the excess fabric and leave the opening a little longer then the rest of the trimmed edges. This will make the opening easier to fold in and sew shut.
 Don’t forget to use your lint roller and get rid of all the excess lint, especially when working with minky.
 Now turn right side out and iron flat.
 Now change back to your regular foot or you can just adjust your zipper foot so that you are top stitching close to the edge. Top stitch as many times as you would like. I usually top stitch mine two times. And now your finished!
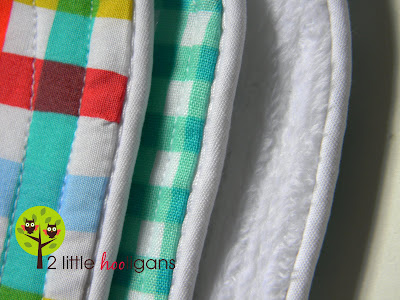
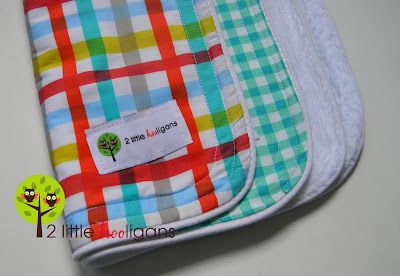
 See the pretty little piping edges? I think it gives the burp cloths a professional and clean looking edge.


 **Please feel free to use this tutorial for your personal sewing projects. You may link this to your blog and use any photo’s. Just please be kind and give credit where credit is due.**
Any questions or comments please do not hesitate to contact me. If you make one using this tutorial, please add it to my flickr group. I would love to see it and you just might see it featured on my blog someday!
Materials Needed:
*one large piece of cotton fabric, flannel and minky fabric all measuring about 14″ x 10″
*one package of piping (will make 2 cloths that are 12″ x 8 1/2″)


 **Please feel free to use this tutorial for your personal sewing projects. You may link this to your blog and use any photo’s. Just please be kind and give credit where credit is due.**
Any questions or comments please do not hesitate to contact me. If you make one using this tutorial, please add it to my flickr group. I would love to see it and you just might see it featured on my blog someday!


Just a quick note to let you know that a link to this post will be placed on CraftCrave today [09 Sep 01:00am GMT]. Thanks, Maria
I've been loving all your recent tutorials for all things baby. But they are making me feel guilty! I have yet to complete a single item for baby Ruth. Not a headband, not a blanket, nothing.
Your things are so cute and I really love these burp cloths with the piping…piping is awesome. Hopefully I can carve out some time soon to give them a try.
liZ
(simplesimonandco)
I love your use of piping on this and other projects, it's just that little something extra that makes it that much more cute! Thank you for sharing your talents.
Great blog here! Also your site loads up very fast! What web host are you using? Can I get your affiliate link to your host? I wish my website loaded up as quickly as yours lol
Thanks for the sensible critique. Me and my neighbor were just preparing to do some research on this. We got a grab a book from our local library but I think I learned more from this post. I am very glad to see such wonderful information being shared freely out there.